Jim Chamberlin
im Chamberlin, St Simons Island, Ga. Began duck hunting about age 10 with my grandfather in Arkansas and have been at it ever since. Hunt locally at least every weekend of the season and go back to Arkansas once a year and hunt with my father. This year my son joined us and made three generations of Chamberlins hunting the timber together. I began carving out of a desire to hunt over birds that I had made myself. I now find that I can't bear to subject them to that abuse! I have never entered any contests but hope to in the near future.The following is a step by step of a traditional hollow black duck which I like to carve. The wood is basswood, the paint acrylic. I have picked up a lot of tips from "lurking" on the forum, I hope someone is helped by this.
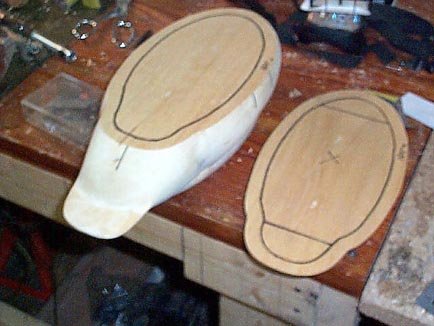
Step One. The body is two pieces of wood which have been planed for a smooth fit. I lay out the body pattern, top and side views, and head profile. I use luan for patterns that I like and intend to use again. I drill the eye hole slightly smaller than the eye I am going to use and later enlarge to accept the eye. Cut the body profile first, then nail the top view back to the block at or near the corners then cut the top view. Save the top view scrap piece for later use.
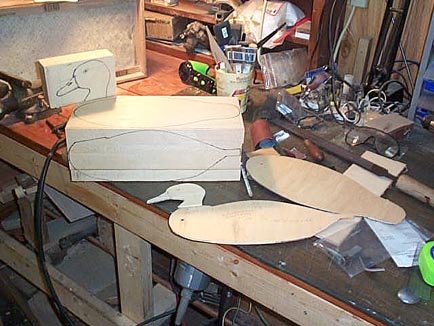
Step Two. Screw the two body pieces together with two substantial screws.
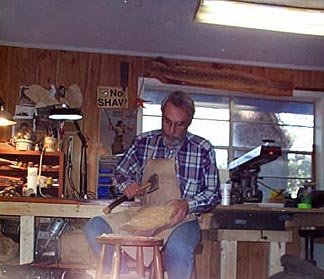
To shape the body I use a hatchet and rasp as shown.
Step Three. Draw reference midline as well as one on the sides tops of the
wings. These will be your high points.

Step Four. Go to work with the hatchet, taking off every thing that does
not look like a duck. I try to get a nice round shape, think of a football.
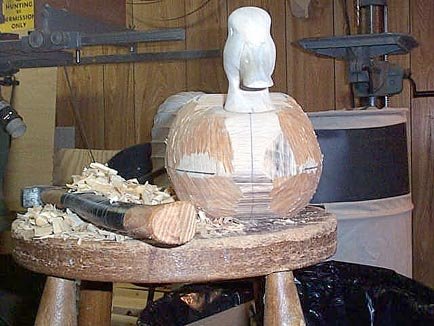
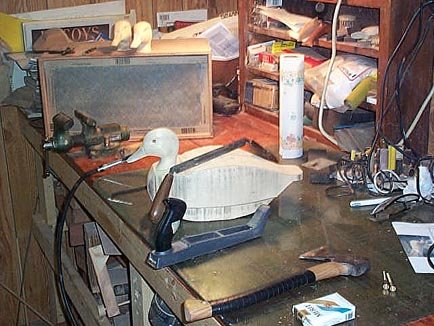
Step Five. Up to this point only the hatchet and rasp have been used. Now lay
out the side pockets, wings and tail. I use a carbide Kutzall (gold) or typhoon
bits and sanding drums (80 to 120 grit) to give definition to the areas I
have laid out.

Step Six. Before separating the body halves, mark the seam where the join so
they can be aligned when you rejoin them.

Step Seven. Mark the area to be hollowed out by coming in 1/2 inch from the
edge of each half.
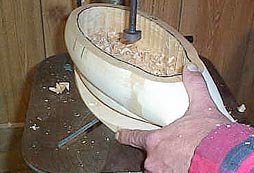
Step Eight. Using the scrap piece from the top view, support the body and
with a forstner bit hollow the inside. Use the depth stop on your drill press.
I usually go no more than 3/16 inch at a time this makes it easier to control
the work, be carefull as you get deeper it can become harder to hold the work
piece steady and the bit can "grab" the work piece. If this happens reduce
your depth more. Be sure and don't get to aggressive in removing wood.
I leave at least 1/2 inch all around.
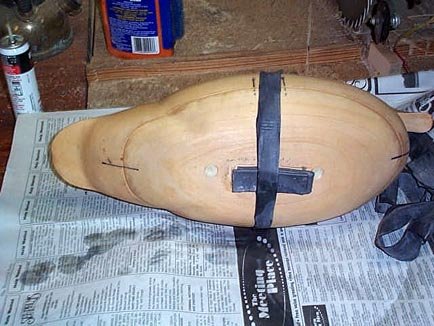
Step Nine. At this point I want to see how the duck will float and adjust with
weight. Holding the two halves together with inner tube strips or large rubber
bands, I add lead weight and mark the correct position. Then use a screw to
attach the weight to the inside of the bottom piece. Before testing seal the
decoy inside and out with Krylon matte finish to keep the wood from absorbing water.
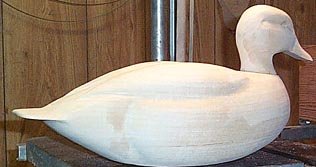
Step Ten. Screw and glue the head to the body. Glue the two halves together.
After the glue is dry fill any gap with wood filler. The decoy is now ready
for finish sanding. I use varying grits from the 120 to 400, then extra fine
steel wool. Then seal the wood with Krylon matte finish. The decoy is now
ready for paint.

Step Eleven. I use a base coat of burnt umber gesso with a little black added
for the body and a gray gesso on the head. Then mix burnt umber acrylic and
small amount of black with a matte medium for the body. I use raw sienna with
small amounts of white and burnt umber for the head with the same matte medium.
Both colors can be further thinned with a small amount of water. Blend the head
color into the crown and eye line and at the head joint ( a better painter than
me should do a more detailed description of this process).

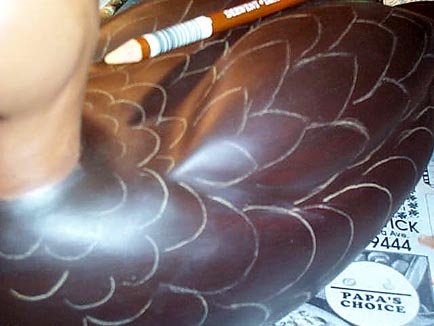
Step Twelve. Mark the feather pattern with a soft artist's pencil. I used
brown ochre on this. Then paint the feathers with a mixture of raw sienna
and small amounts of white and burnt umber, a little more raw sienna than was
used on the head. For the bill I use raw sienna with small amounts of permanent
green deep and yellow ochre light. For the secondaries use ultramarine blue
with a small amount of acra violet, edged with a thin black line followed by a
thin white line. At this point I use very thin coat of the body coat to dull
the colors somewhat. Finally I use Testor's Dull Coat to Seal the whole bird.
You're done!